Lately, I have constantly been thinking about making ornaments. I think it’s a sign that I’ve finally gotten into the holiday spirit, and I’m here for it! Not only are ornaments great for decorating, but they also make great gifts. Making your own ornaments is incredibly rewarding, and it makes them extra special when you give ornaments as gifts.
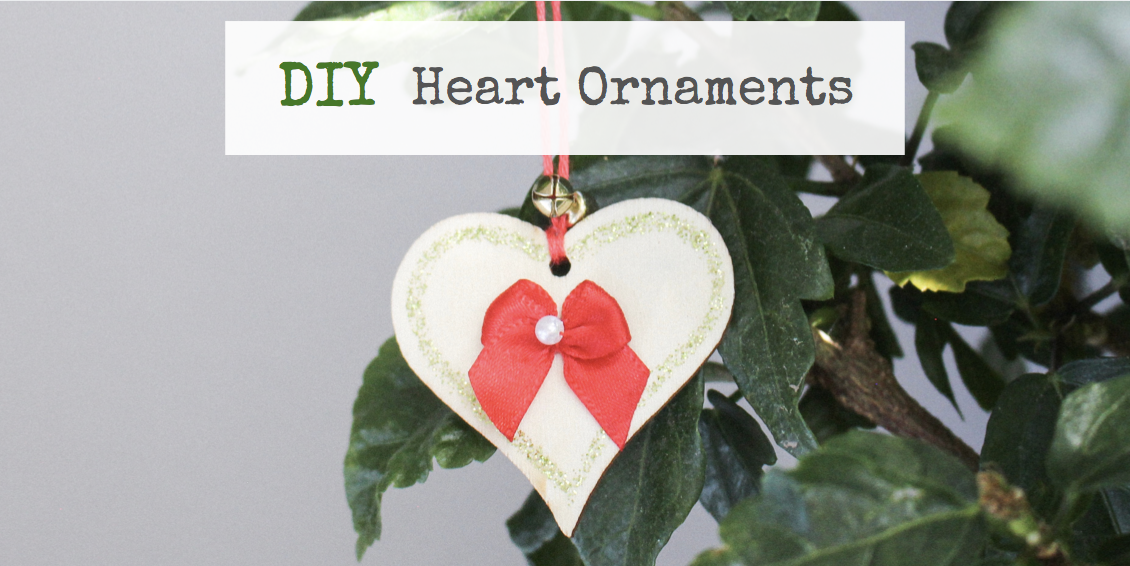
Since I couldn’t stop thinking about making ornaments, I decided I might as well get started! I strung together some ideas and came up with these heart ornaments. I’m so happy with how they turned out! These ornaments are incredibly simple to make and look super cute for the holiday season!
This post contains affiliate links. As an affiliate, I earn a small commission from purchases made of the products featured in this post.

What you’ll need:

If you don’t have bows or would like to use something else as an embellishment, that’s totally okay! You can mix and match these ornaments however you’d like.
Step 1:
Start out by tying the string onto the ornament. These wooden cutouts have holes which makes things much easier. I do a larks head knot, where you make a loop and pull through, but you can tie it however you’d like!

Step 2:
Now, add the little jingle bells onto the strings. I put them at the very bottom so they’re on top of the heart, but you can tie them higher on the string if you’d like.

Step 3:
Next, I added the glitter glue outline. It helps if you move the bells up the string just for now so you don’t smudge them in the glitter. I chose green for my ornament, but these pens come in a lot of different colors to choose from. I also like to do two coats of the glitter to make sure it’s really bright.

Step 4:
Next is adding the bow or embellishment you’d like to use. To add the bow, I put a big glob of glue on the back of the bow, then push it onto the center of the heart. The glue I’m using for this dries clear, so there’s no need to worry if it gets anywhere else on the ornament.


Step 4:
All that’s left is tying the knot at the end! How long you want the string and how you’d like to tie the ends is completely up to you. I like to do a tiny bow at the top, but there are lots of different possibilities. After tying the ends, I like to put a dab of glue on the knot so that it stays securely tied.


That’s it for this ornament DIY, I hope you like them and give it a try. Making ornaments is such a fun holiday activity, I loved making these!


Leave a Reply