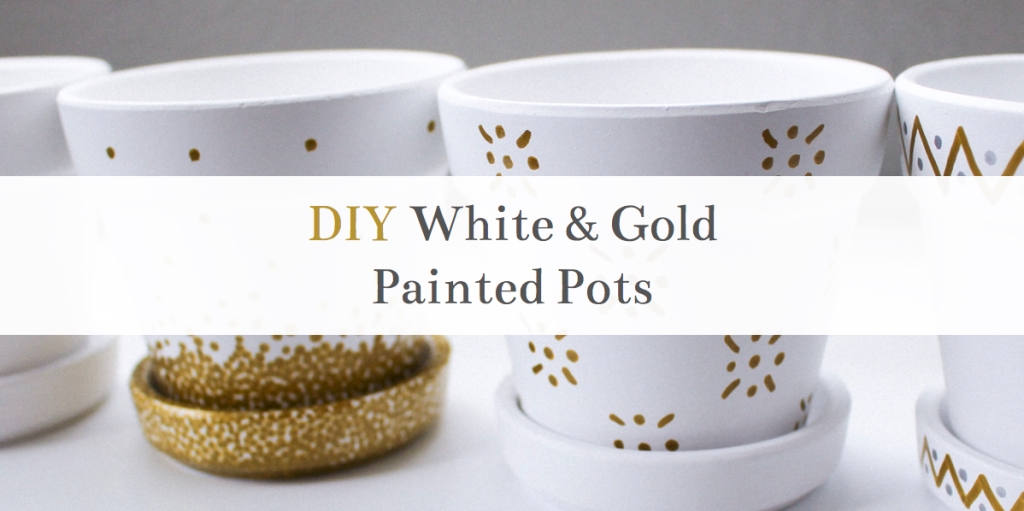
As we get closer to spring, I thought it’d be fun to do a post that would help get everyone in the mood for warmer weather. I’m so excited for this post, because this was so fun to do! In this post I’m going to show you how I painted these adorable little ceramic planters.
To paint my pots, I used these awesome little acrylic paint markers. These markers made painting so easy, but you could also use regular paint and brushes too! There’s so many designs you could come up with, and I hope mine give you some good inspiration.

This post contains affiliate links. As an Amazon Affiliate, I earn a small commission from purchases made of the products featured in this post.
What you’ll need:

Really all you need are just the two things listed above. The ceramic pots I used for this came from a set on Amazon of 12 pots with saucers included. The paint markers are also from Amazon and come in a perfect set with just about every color you’d need.
Ombré Design

Step 1: Begin by painting a bunch of dots really close together towards the bottom of the pot. The dots should be touching each other so as to make it look almost solid gold. If you have a ceramic saucer to go with your pot, you can paint that as well to help make the design more cohesive.
Step 2: As you move up the pot, begin spreading out the dots so they are no longer touching. Once you’ve gotten near the top, they should be so spread out that there are just a few near the top.

Zig-Zag Design

Step 1: Start out by drawing a zig-zag line around the top of the pot, trying to keep it even all the way around. I also did a zig-zag line around the matching ceramic saucer.
Step 2: Next add the dots inside the zig-zag lines. You can do this with a different color to add some contrast, or stick with the same color as the zig-zag lines.

Sun Design

Step 1: Start out by making a dot in the center of the pot. It doesn’t matter if it’s perfectly in the middle, as you can add more dots to one side to make things look even. I do admit, though, this one is a little tougher and definitely takes some concentration.
Step 2: As you get towards the outsides of the sun, you can go along the edges and add more dots in certain places if needed to make it look more circular.

Stars Design

Step 1: The best way do do this one is to envision stars in somewhat of a checkerboard pattern. Start out by making four dots. One in the center, one on each side, and one on the top and bottom.
Step 2: Next, draw small lines in between the dots, in the four corners of the star. As you move along with each star, try to keep them spread out in the checkerboard pattern so that none are touching.

I hope you’ve liked this post! These pots are super easy to paint, especially with these handy little acrylic markers. The supplies I used are also listed below, simply click on the photo to be taken to the products page on Amazon. Happy gardening!
Supplies Used in this Post:


Leave a comment